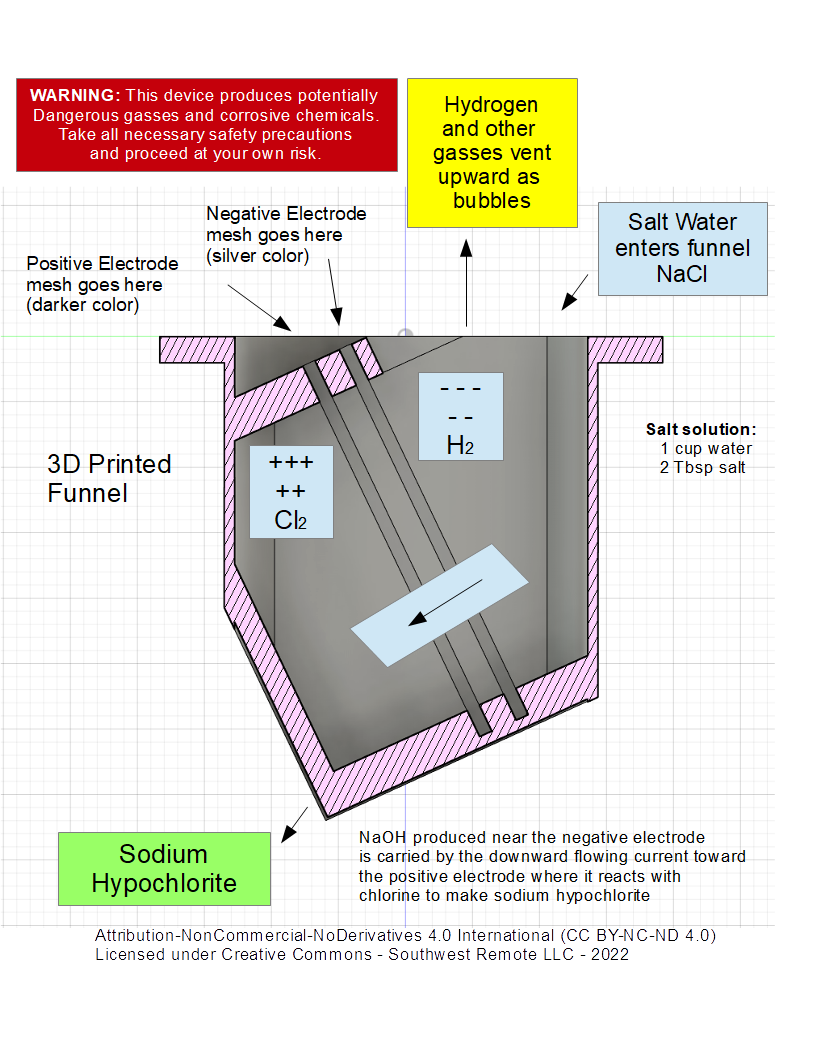
WARNING: This device produces potentially dangerous gasses and corrosive chemicals. The project and information listed on this page has been contributed by volunteers and hobbyists. Neither Southwest Remote LLC or any of the authors, contributors, anyone else connected with this site, in any way whatsoever, is responsible for your use of the information contained in or linked from this project. Please read our Privacy Policy and Terms of Use for more information. Do your own research, take all necessary safety precautions, and proceed at your own risk.
Introduction:
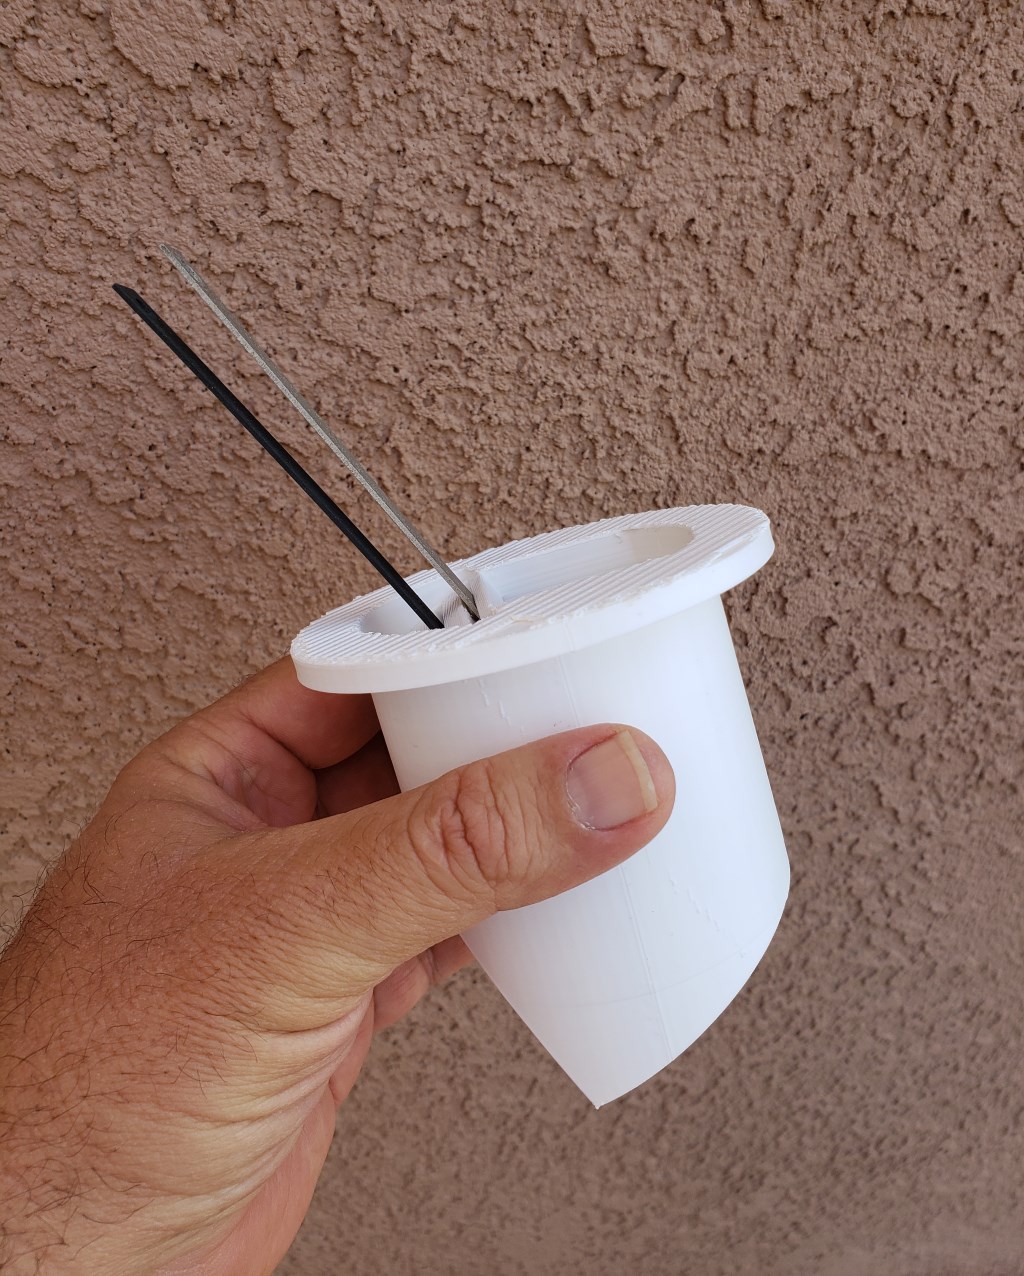
This simple funnel device uses electrolysis to turn a salt water solution made from ordinary table salt into sodium hypochlorite, a useful form of chlorine. Chlorine can be used to purify water and is a well known anti-bacterial and anti-viral cleaning agent. There are other similar DIY projects out on the web, but many of them seem unnecessarily complicated to build. Our goal was to create a simple one piece 3D printed funnel design that does not require plumbing fittings, gaskets, glues, or other moving parts. Our design uses a two chamber funnel that holds a pair of mesh electrodes equally spaced apart. Place the funnel in a 1qt glass canning jar, connect the electrodes to a 12v power supply, and slowly pour the salt water solution through the funnel. That's all there is to it, it only take a few minutes to make one cup of concentrated sodium hypochlorite bleach.
How it works:
This device uses electrolysis, a DC electrical current, to break down and/or cause a chemical reaction. Two equally spaced mesh electrodes are held in place by grooves in the funnel wall. The funnel has two chambers, one above and one below the electrode pair. 12v DC power is applied to the electrodes. When a salt solution is present between the electrodes a powerful electric current will flow through the solution. This electrical current drives the chemical reaction by breaking molecule bonds in the liquid. The downward flow of the liquid encourages the chlorine molecules to react with the sodium before leaving the funnel, while hydrogen and other gasses float to the top in the form of bubbles.
What you'll need:
- 3D printed funnel ( .stl file download link is provided below )
- Table salt ( 2 Tbsp of salt for each cup of water )
- Coated Titanium Electrodes 2" x 3" mesh
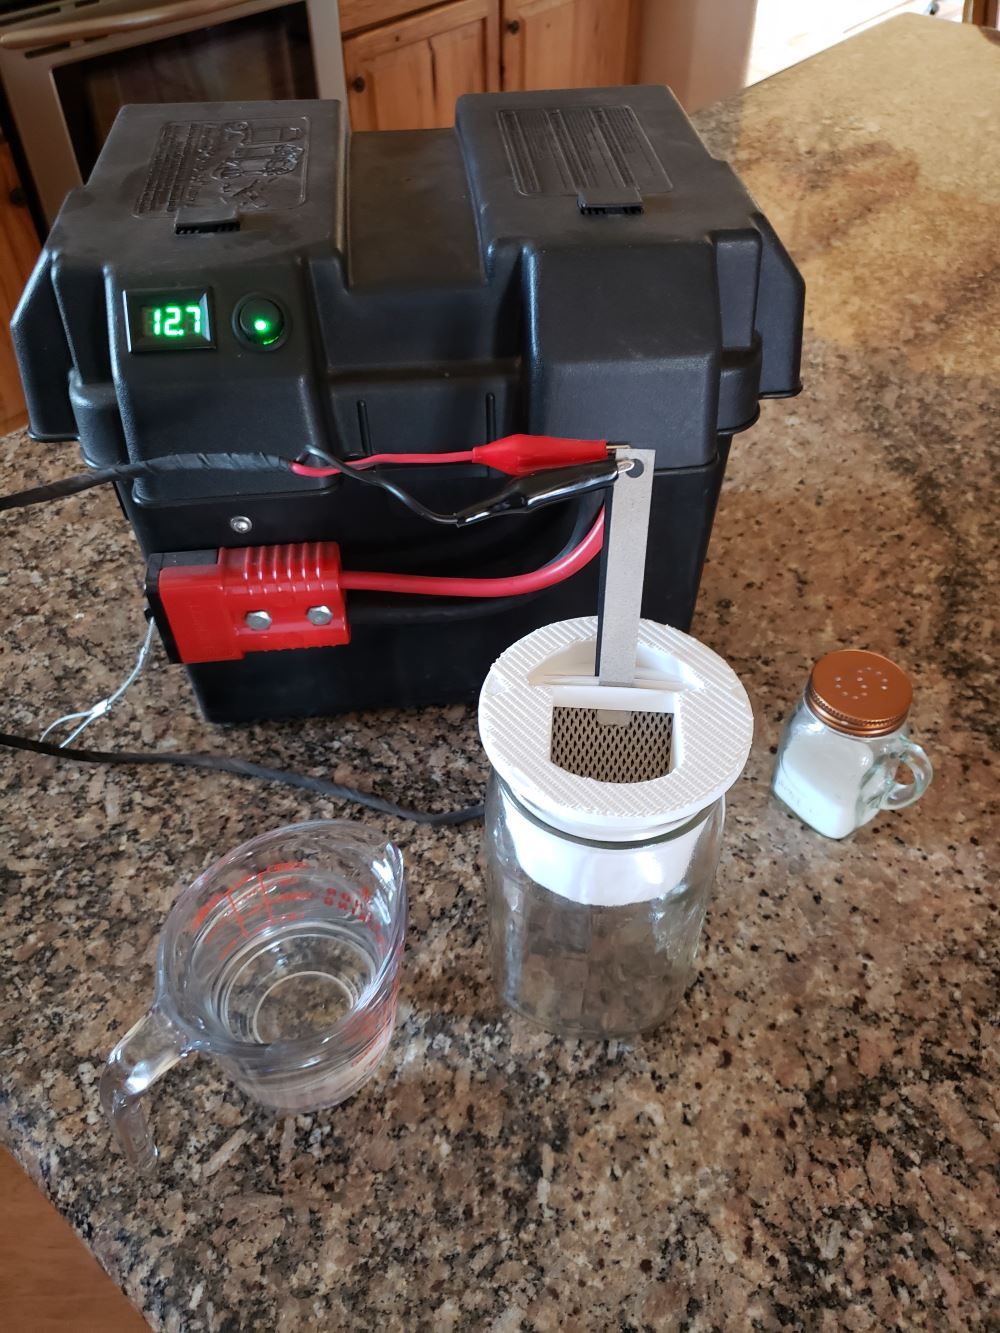
- Wires or test leads with quick release clips
- 12v - Car Battery or similar power source
- Chlorine test strips ( optional, but highly recommended )
FUNNEL (3D printed ABS):
The funnel was designed to fit inside a 1qt glass canning jar. The STL file download link is provided below. If you have a 3D printer great! This is a simple print and does not require supports. If you don't have a 3D printer, it shouldn't be hard to find a friend, makerspace, or service who can print the funnel for you. We recommend using ABS plastic filament for the print.
This funnel is provided under the following license (CC BY-NC-ND 4.0)
Attribution-NonCommercial-NoDerivatives 4.0 International
DOWNLOAD: By downloading this file you agree to the terms of the license.
https://southwestremote.com/download/Funnel3-May22.zip
ELECTRODES:

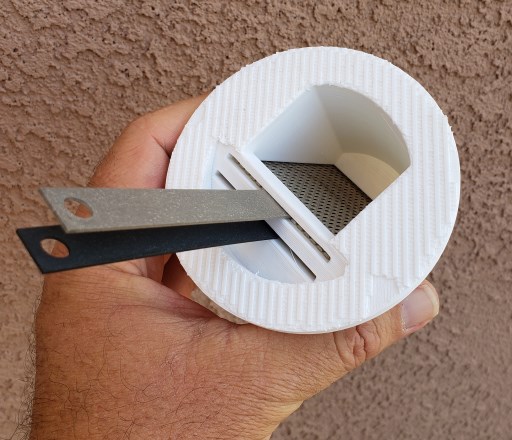
The electrodes are coated titanium mesh. These kinds of electrodes are used for electrolysis and sometimes found in electroplating machines. The electrolysis process can be very corrosive to other types of metal electrodes. Using coated titanium will minimize the oxidation and degradation of the metals. Using a mesh maximizes the contact surface area and increases the efficiency of the electrical current flowing through the salt water.
NOTE: The funnel design requires a pair of 2 inch by 3 inch rectangular electrodes (as shown in picture above )
To purchase the electrodes, search for the following keywords on eBay or other online retailer: - (Ir-Ru) MMO Mesh Anode & Titanium Mesh Cathode Set, 2" by 3"
MMO Anode, Mesh
- Coating: Iridium/Ruthenium Oxide
- Darker color coating
- Anode - Positive wire goes on this one
Titanium Cathode, Mesh
- Purity: C.P. Grade (commercially pure)
- Silver color coating
- Cathode - Negative wire goes on this one
PUTTING IT TOGETHER:
INSTRUCTIONS:
Mix two tablespoons of salt into one cup of warm water. Stir slowly until the salt is mostly dissolved. Place the mesh electrodes into the funnel such that the Anode (positive) (darker mesh) is lower in the funnel chamber. Place the funnel into a wide mouth glass jar.
Make sure you are in a well ventilated area and are wearing personal protective equipment. (gloves, respiratory, and eye protection. etc)
Carefully connect the wires from the battery to the electrodes while paying careful attention to polarity. The positive wire connects to the lower (darker) electrode.
WARNING: DO NOT ALLOW THE ELECTRODES OR WIRES TO TOUCH EACH OTHER.
Slowly pour the salt solution into the funnel. You will begin to hear and see bubbles forming in the funnel, this is normal. The current flowing to the electrodes is proportional to the amount of liquid in the funnel. Pouring more slowly will reduce the load on the battery. To increase the concentration, you can pour your solution through the funnel multiple times. We've found that repeating the process 3 to 5 times produces a strong concentration.
TESTING:
We recommend you order some chlorine test strips so you can verify the chlorine content of your final solution. These can be purchased at Amazon or other online retailers. We used test strips intended for testing cleaning products.
How you use your sodium hypochlorite is up to you and out of the scope of this how-to. Search online to learn how to safely purify water and make cleaning solution concentrations based on the results of your individual testing.
----